One day Play – Create a TFS 2017 Instance On Azure Virtual Machine
Prerequisite
- Azure account
- TFS 2017 (Trial)
- SQL Server 2012 and above (SQL Express is fine for demo and self play)
- Domain Name (there are many free domain register provider nowadays, see more details later)
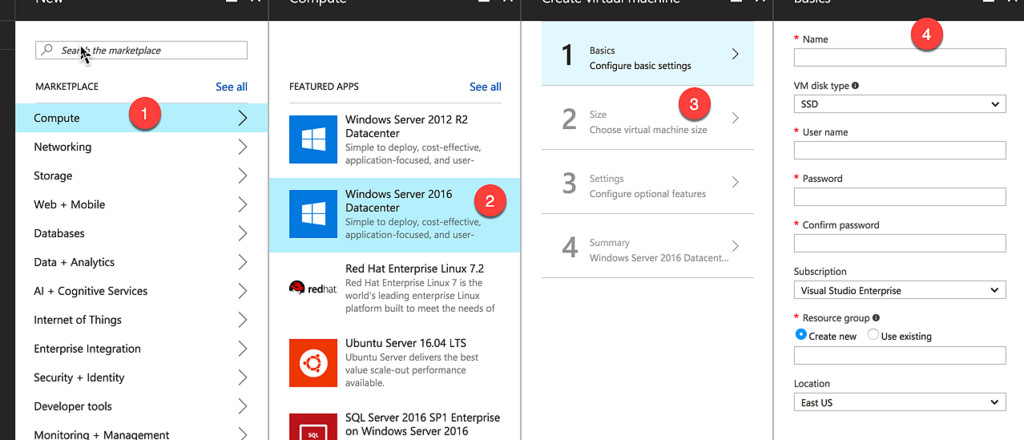
Step 1 – Spin up VM
Sign up a free Azure account, then spin up a VM with Windows 2016 Data Centre image
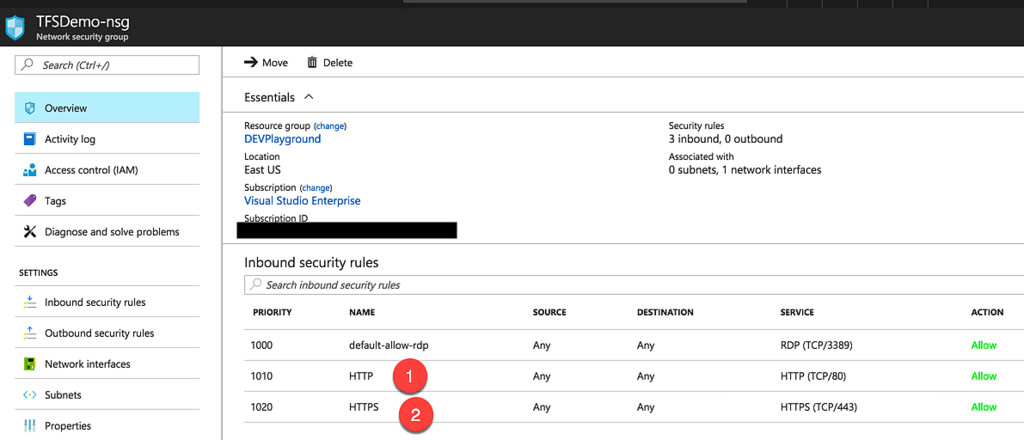
Step 2 – Configure NSG (Network Security Group)
Make sure you add both HTTP and HTTPS in the Inbound security rules, so we can later access from external.
Step 3 – SQL Server and TFS Installation
Download SQL Server 2016 Express installer (5MB) from the link below, then follow the instruction and install with default settings.
[sql server 2016 express]https://www.microsoft.com/en-us/sql-server/sql-server-downloads
Download TFS 2017 installer (2MB) from the link below, then follow the instruction and install with default settings
[tfs 2017] https://www.visualstudio.com/en-us/news/releasenotes/tfs2017-relnotes
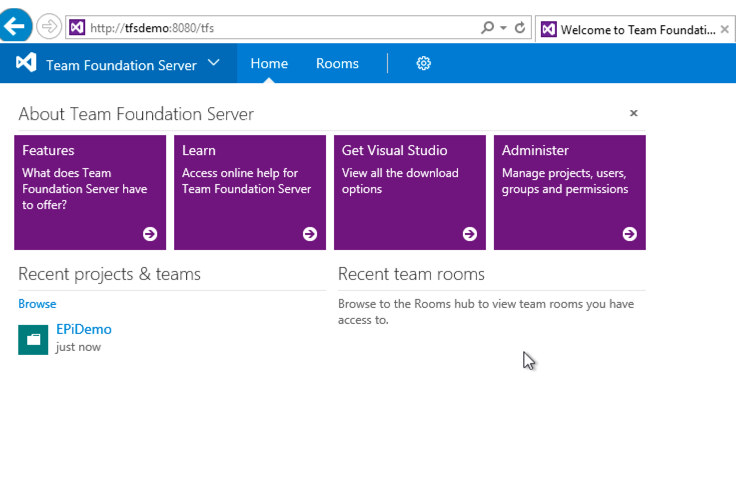
By default, TFS will be running on port 8080. In this example, my TFS web url is
http://tfsdemo:8080/tfs
Open you your TFS site in IE, make sure you can see the TFS homepage
Step 4 – Register a free domain name
In this step, we’ll register a DNS, and in the next few steps we can configure the TFS to be accessible from external.
After a quick search, I found http://www.freenom.com/ that seems good enough and satisfy me need, so I registered a few free domain names from this site. Registration process is quite straightforward and only took me a few minutes to get my free domain name. 🙂
Once you logged in to the site, you can access to your domain management from Services menu.


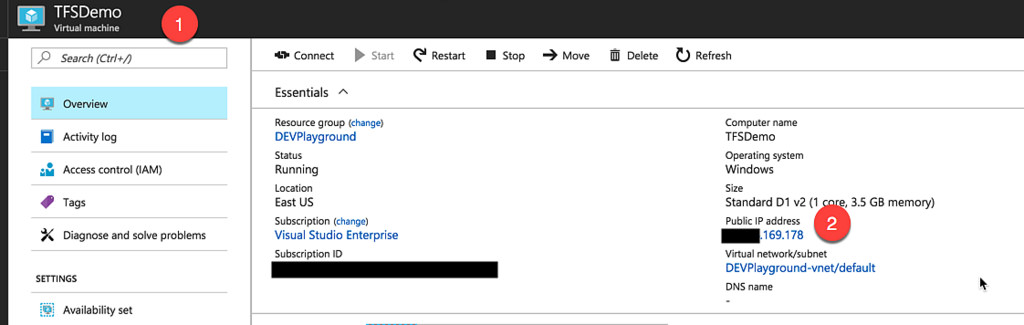
Before set up your DNS, you will need to get the virtual machine public IP from Azure portal
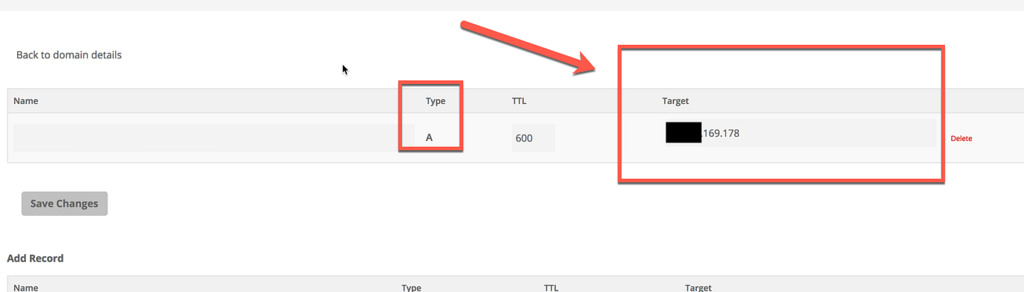
In the DNS management screen, put the public IP in the target for A record.
Step 5 – Bind the domain name on TFS site
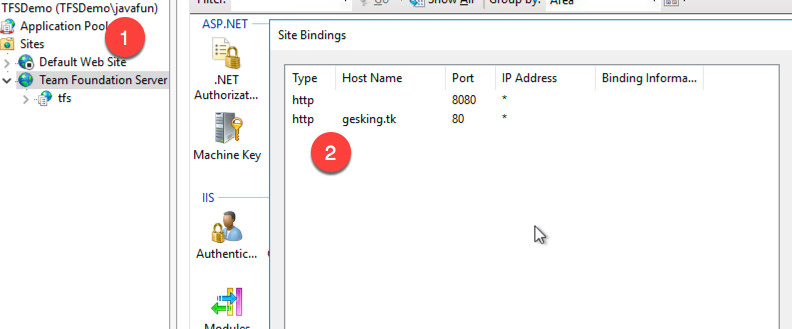
Open the IIS, first disable the Default Website,then locate to Team Foundation Server site, add a new binding
Port: 80
Host Name: <The one your registered in step 4>
Step 6 – Update the TFS public url
You can change the TFS public url via TFS Admin console.
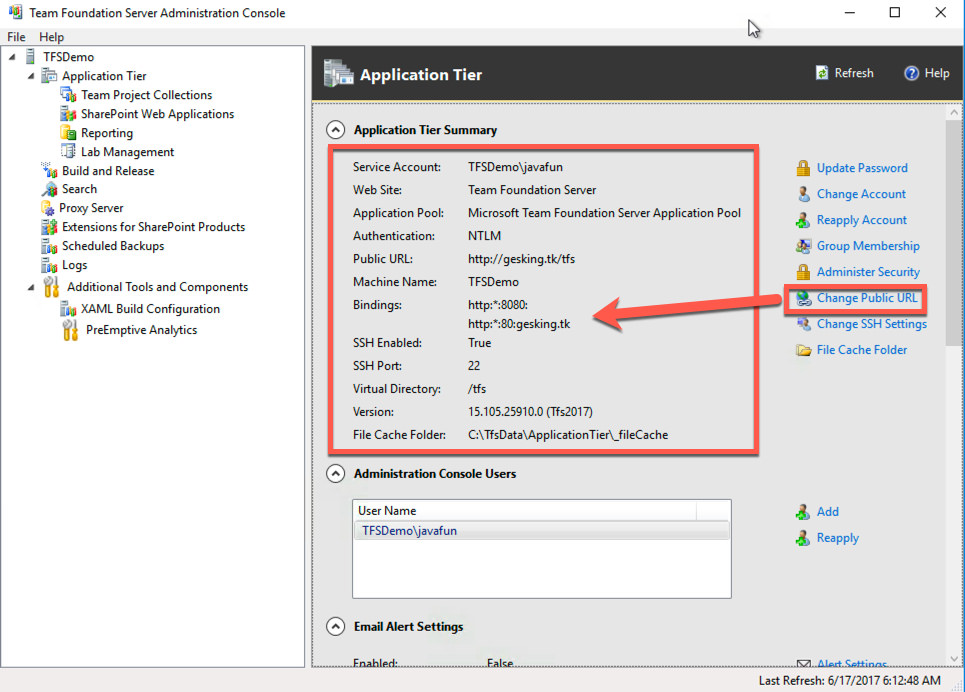
TIPS: If you try to test the new public url from TFS server, you will be prompted to enter username and password, but I couldn’t manage to log in successfully. I can’t figure out what caused this. If you want to access the TFS on its server, you’ll need to continue using your the local url with port 8080.
Congratulation, you have completed everything, and your TFS server is now publicly available.
It’s a tough day, but finally I get it working 🙂 Hopefully, this might help you.
Comments powered by Disqus.