Episerver headless js - part 1 :setup
This is part 1 of Episerver Headless JS blog post series. In this post, I’ll try to cover everything you need to get Content Delivery API running on your local development from scratch.
Set up demo instance
In this demo, I assume you have Episerver CMS Visual Studio extension installed already. If not, you first need to install this from Visual Studio extension manager.
Create a new Alloy site via Visual Studio Episerver project template.
Install the
EPiServer.ContentDeliveryApipackages, and this package has dependencies on the other three content delivery packages -EPiServer.ContentDeliveryApi.OAuth,EPiServer.ContentDeliveryApi.CmsandEPiServer.ContentDeliveryApi.Core.Add the following lines to your container initialization module, this configuration will enable client js
anonymouslyconsuming the API.1 2 3 4 5 6 7 8 9 10 11 12 13 14 15 16 17 18 19
[ModuleDependency(typeof(ContentApiCmsInitialization))] public class DependencyResolverInitialization : IConfigurableModule { public void ConfigureContainer(ServiceConfigurationContext context) { // Other dependencies/configuration code context.Services.Configure<ContentApiConfiguration>(config => { config.Default().SetMinimumRoles(string.Empty); }); } } ``` > <span style="color:#e6b219;">**Caution:**</span> > > 1. If you missed this step, you'll get login form when request the API from your REST client. > 2. `ModuleDependency` needs to be set to `ContentApiCmsInitialization`.
Adjust virtual role configuration
If you need to use On-page editing (data-epi-edit="YourProperty") with client side rendering feature in the CMS, you’ll need to enable the beta feature.
1
2
3
4
5
6
7
8
9
<episerver.framework>
      <providers>
        <!-- The rest of roles -->
        <add name="EPiBetaUsers" type="EPiServer.Security.MappedRole, EPiServer.Framework" roles="Everyone" />
      </providers>
    </virtualRoles>
    <virtualPathProviders>
    <!-- The rest of settings -->
<episerver.framework>
Configure required permissions
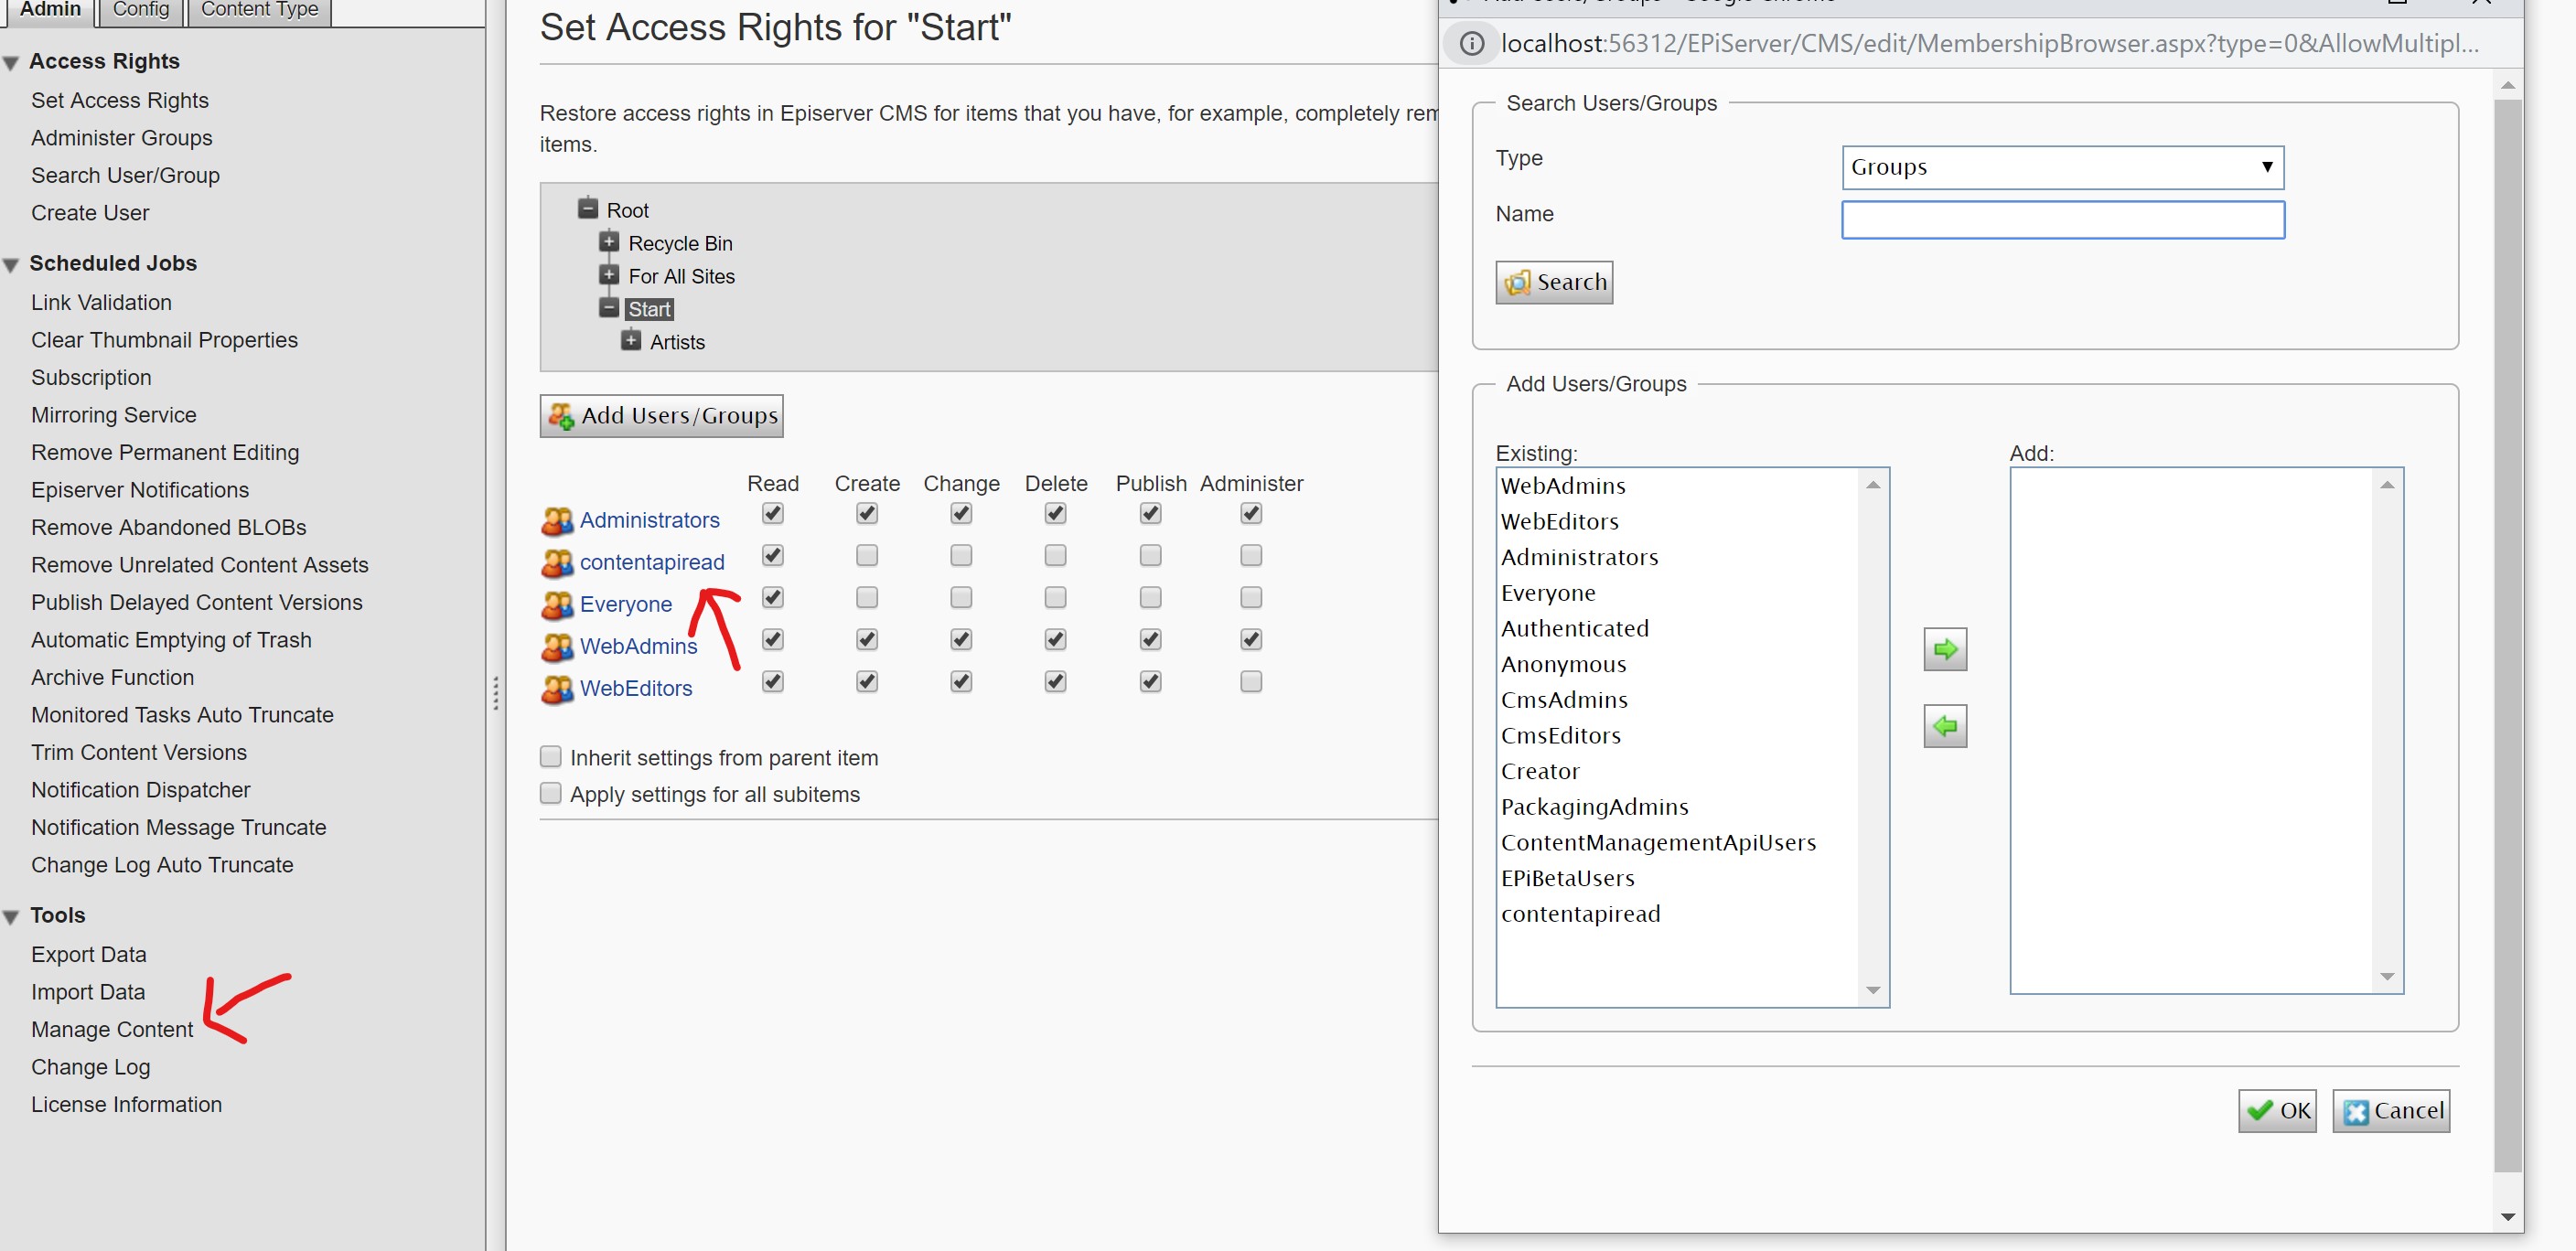
Lastly, you’ll need to ensure contentapiread role has been granted read permission to all contents you want to expose through the content delivery API.
Test & verify your API
Once you’ve completed the above-mentioned steps, you will have a list APIs available on your hosting site.
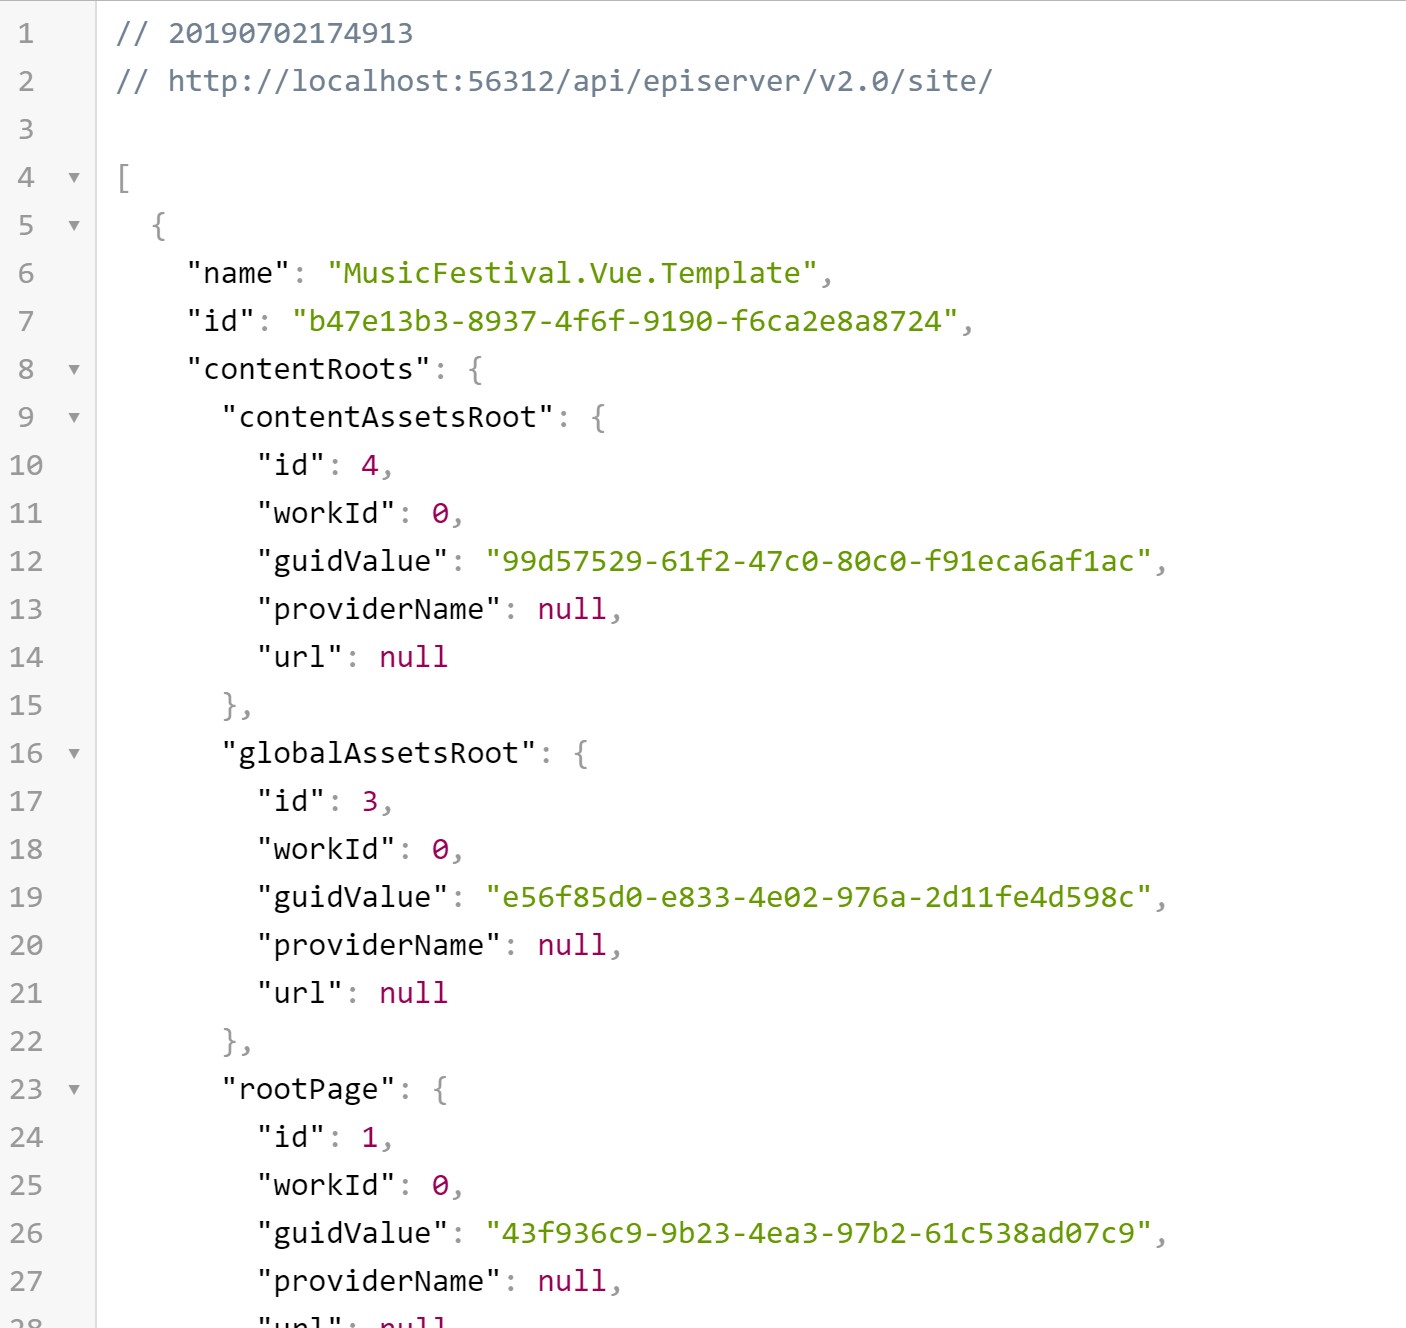
Verify content delivery API
To verify whether the API is fully working, open #7 API endpoint in your browser, you’ll see the site and associated properties.
Test content API
To test the content API, you’ll need to use postman as it requires to pass additional headers to get the result.
Copy #3 API endpoint to your postman, add two headers and set values as followings
- Accept: application/json
- Accept-Language: en,sv
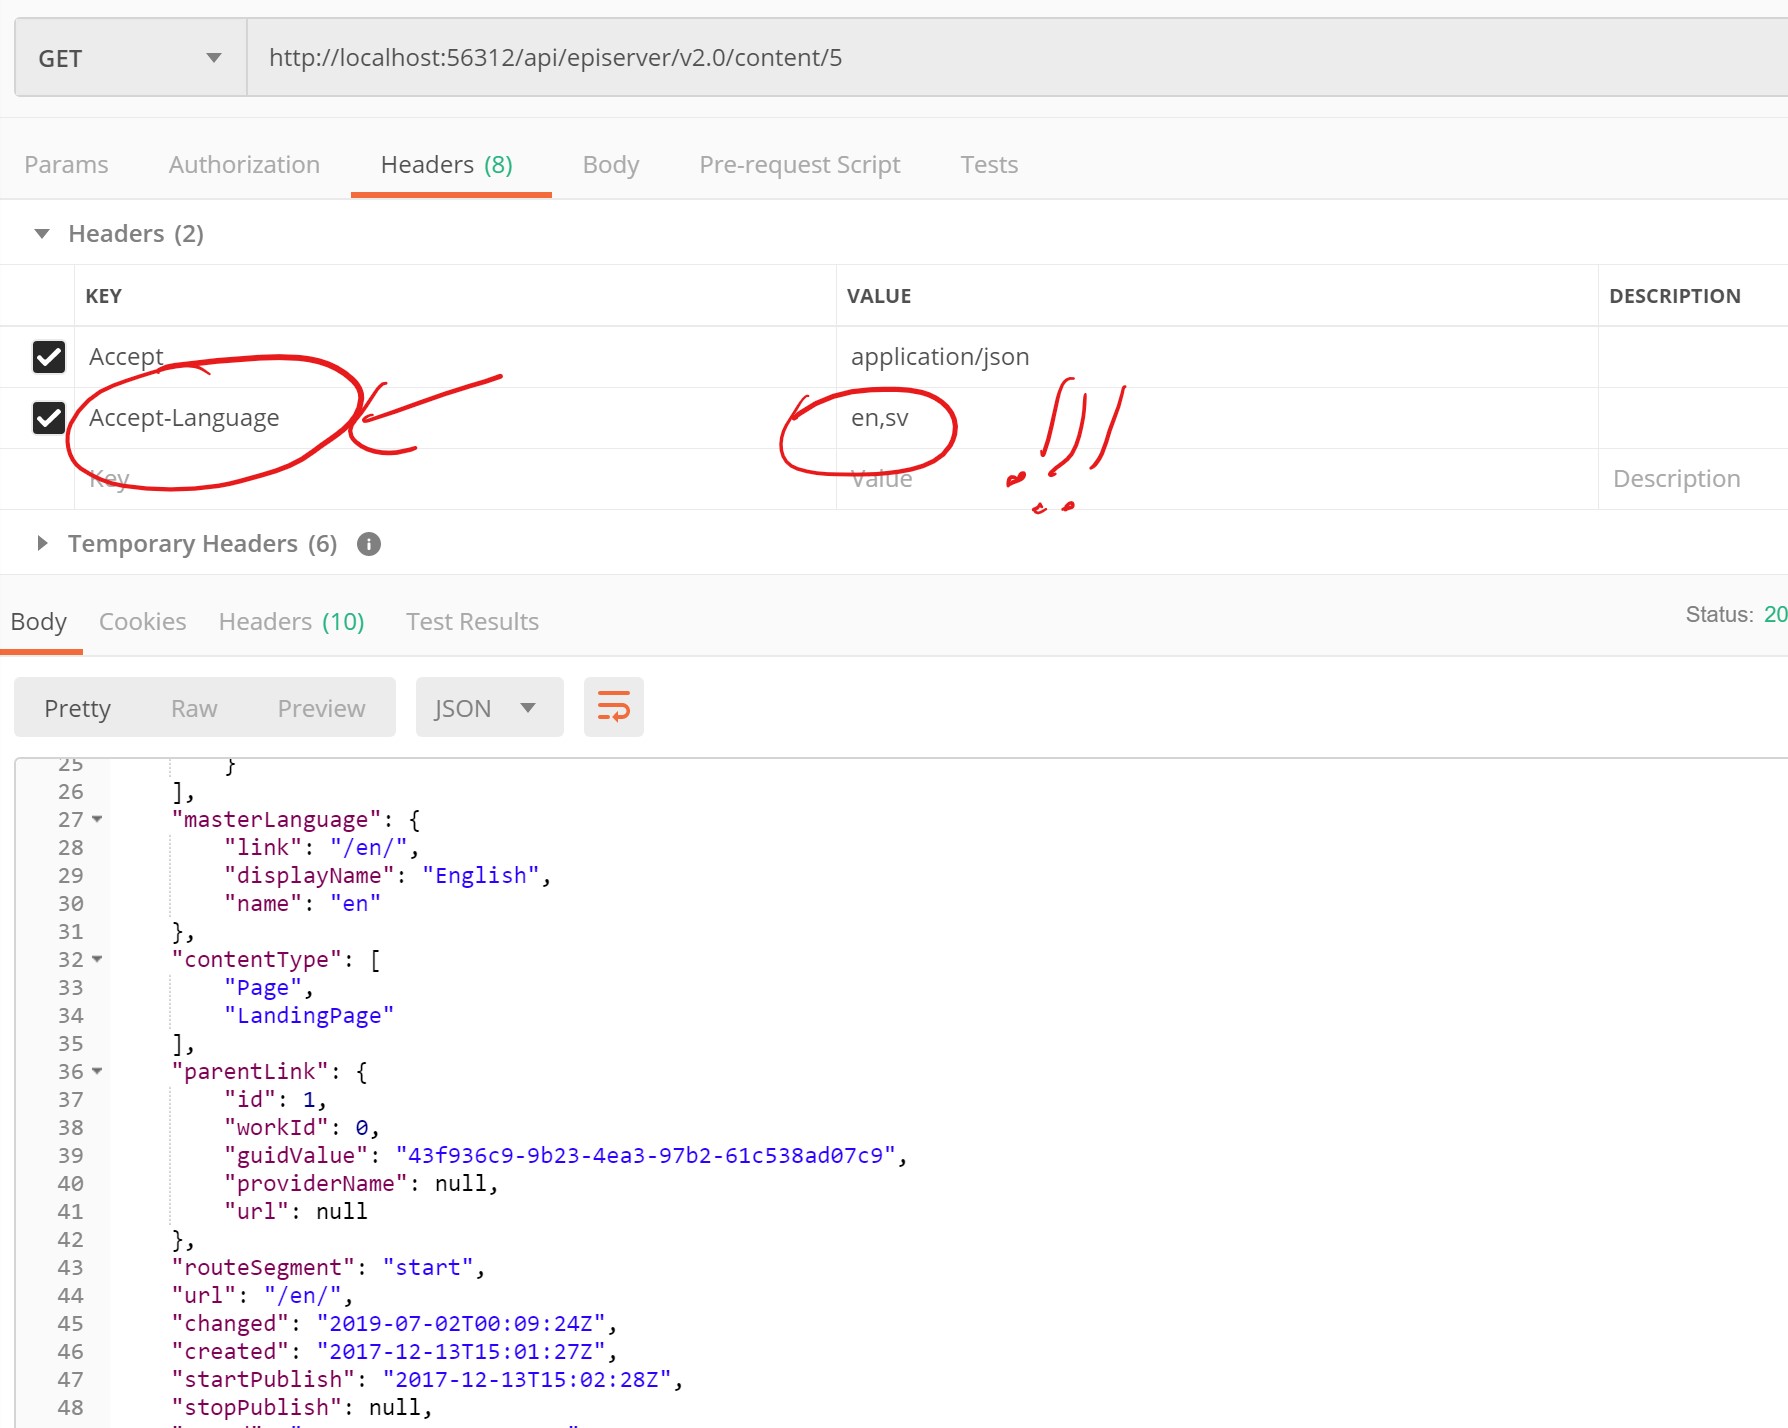
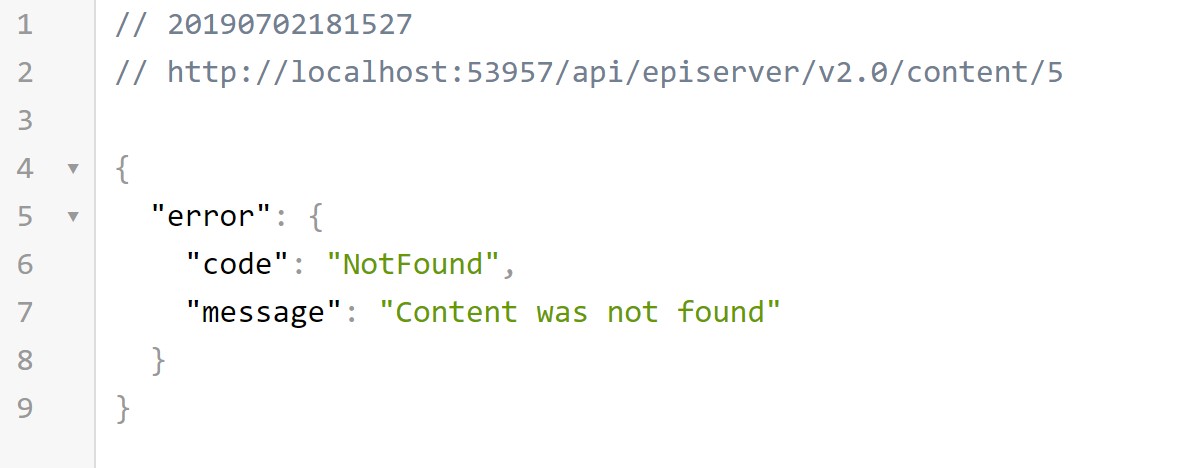
Note: If you use browser to test #3 content API endpoint, you’ll receive the deceptive error, the content does actually exist, but the language header is missing.
List of endpoints
| # | Verb | Endpoint | Description |
|---|---|---|---|
| 1 | POST | /api/episerver/auth/token | Authorization |
| 2 | GET | /api/episerver/auth/token | Get new access token by using refresh token |
| 3 | GET | /api/episerver/v2.0/content | Retrieve multiple content items |
| 4 | GET | /api/episerver/v2.0/content/{referenceORguid} | Retrieve content by content reference or content guid |
| 5 | GET | /api/episerver/v2.0/content/{reference}/children | Retrieve child content of a content reference |
| 6 | GET | /api/episerver/v2.0/content/{reference}/ancestors | Retrieve ancestor content for a content reference |
| 7 | GET | /api/episerver/v2.0/site | Retrieve a list of sites in the system and their associated properties. |
Reference
Content Delivery API official documentation
Content Delivery API swagger documentation
On-page editing with client-side rendering
Happy Coding! 😇
Comments powered by Disqus.